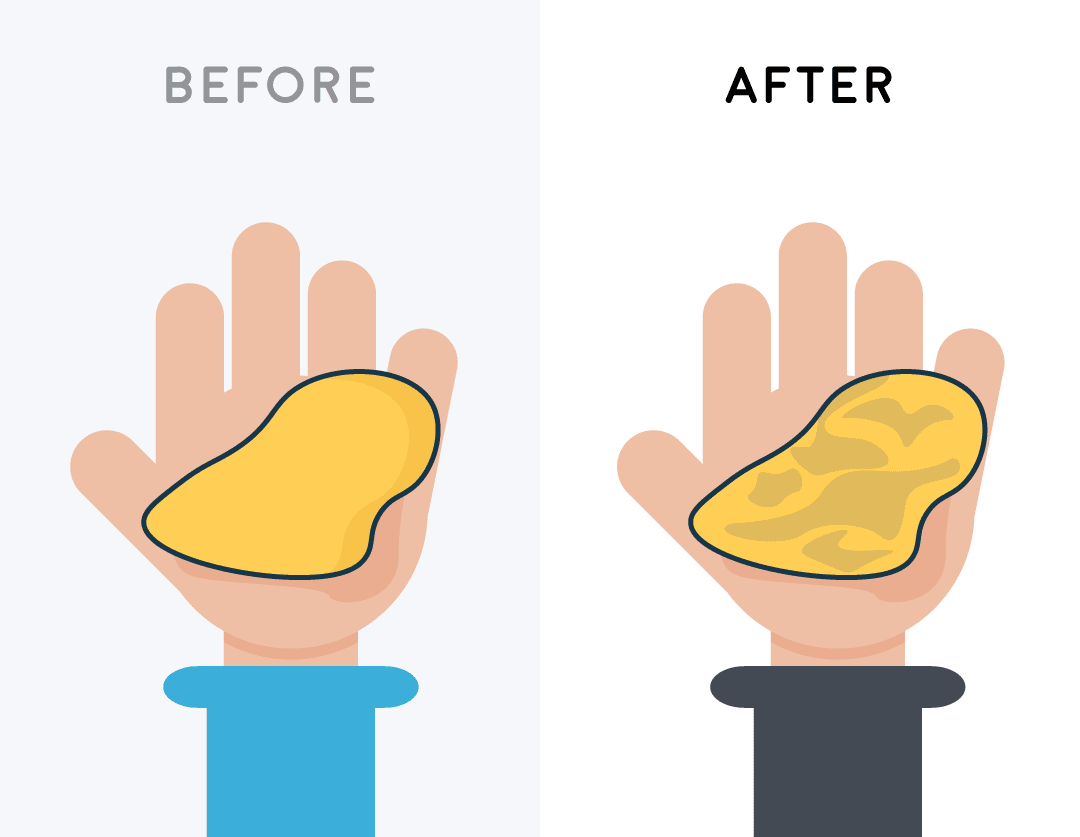
In recent years, the rise of mobile car wash services has marked a significant shift in how we maintain our vehicles. Not only do they offer convenience, coming directly to the customer to clean their vehicle, but they also bring with them a suite of environmental benefits. This article explores how mobile car washes are paving the way for a greener, more sustainable approach to car maintenance.
1. Reduced Water Usage
Traditional car washes can use up to 50 gallons of water per vehicle, a number that quickly adds up considering the millions of cars washed daily worldwide. Mobile car washes, on the other hand, often utilize water-efficient practices, such as using high-pressure nozzles that significantly lower water consumption. Some services have even adopted waterless washing techniques, which rely on eco-friendly products to clean cars without a single drop of water.
2. Prevention of Water Pollution
When cars are washed on streets or driveways, the runoff water—laden with dirt, oil, and detergent—flows into storm drains and eventually into rivers, lakes, and oceans, polluting these bodies of water. Mobile car washes mitigate this issue by using biodegradable soaps and ensuring that dirty water is collected and disposed of properly, preventing harmful chemicals from entering the natural water cycle.
3. Eco-Friendly Cleaning Products
Many mobile car washes are committed to using environmentally safe cleaning products. These solutions are not only gentle on the planet but also safe for the technicians who use them and the vehicle owners. By avoiding harsh chemicals, mobile car washes ensure that vehicles are not only clean but also that the cleaning process does not contribute to the degradation of the environment.
4. Energy Efficiency
Without the need for large, stationary facilities, mobile car washes inherently consume less energy. They eliminate the need for the energy-intensive mechanisms of traditional car washes, such as conveyor belts and blow dryers, further reducing their carbon footprint.
5. Reducing Your Environmental Impact
Choosing a mobile car wash service doesn’t just save time; it also signifies a step towards reducing your personal or business’s environmental impact. It’s a simple yet effective way to contribute to water conservation efforts, reduce pollution, and support the use of eco-friendly products.
Conclusion
The shift towards mobile car wash services represents a win-win for both the consumer and the environment. As awareness grows and technology advances, these services are set to become even more efficient and environmentally friendly. By opting for a mobile car wash, you’re not just getting a clean car; you’re also making a choice that supports a healthier, more sustainable planet. Let’s embrace this eco-friendly approach to car maintenance and drive towards a greener future.
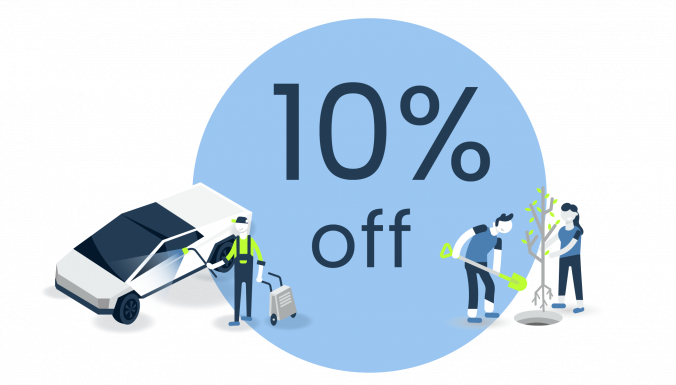
Let’s Make a Difference
Choosing Washos means supporting a cleaner, healthier planet without compromising on the quality of your car’s care. Take advantage of our Earth Month special and book your eco-friendly car wash today.
In celebration of Earth Month, we’re excited to offer you a 10% discount on our mobile car wash services. Use the code EARTHSHINE when booking your next wash and join us in making a positive impact on our planet.
While the rain can bring a sense of renewal and freshness to the air, it doesn’t quite have the same effect on our vehicles. Contrary to the belief that rainwater acts as a natural cleaner, it actually necessitates a thorough wash afterward. Here’s why washing your car post-rain is not just about aesthetics but crucial for its upkeep and longevity.
1. Contaminants in Rainwater
Rainwater isn’t the distilled water many imagine it to be; it’s a cocktail of pollutants picked up from the atmosphere. Dust, pollen, industrial pollutants, and even particles from vehicle emissions are carried by raindrops. When the rainwater evaporates from the surface of your car, these pollutants are left behind, clinging to the paint. Over time, these contaminants can corrode the paint and protective coatings, leading to costly damage.
2. The Rust Factor
Rain might seem harmless, but it’s a silent enemy against metal. The moisture from rain can seep into every nook and cranny, finding its way into tiny scratches or chips in the paint. This moisture starts the oxidation process of the metal beneath, leading to rust. Regular washing post-rain helps remove moisture and the minerals that contribute to corrosion, thereby mitigating the risk of rust.
3. Acid Rain: A Clear and Present Danger
One of the more insidious forms of precipitation is acid rain, which is rainwater mixed with pollutants like sulfur dioxide and nitrogen oxides. These substances can lower the pH of rainwater, making it acidic enough to eat away at the car’s paint and clear coat over time. Washing your car after exposure to acid rain can prevent these chemicals from causing long-term damage.
4. Battling Water Spots
The minerals found in rainwater, such as calcium and magnesium, don’t evaporate. Instead, they remain on the car’s surface as water spots. If not promptly attended to, these spots can etch into the paint, becoming a permanent eyesore. Regular washes after rain help avoid the formation of these spots, maintaining the integrity and appearance of the car’s exterior.
5. Visibility for Safety
The importance of clear visibility while driving cannot be overstated. Rain can smear dirt and grime across windshields and windows, reducing visibility and increasing the risk of accidents. A thorough wash after the rain includes cleaning the glass surfaces, ensuring drivers have unobstructed views of the road.
6. Preserving Value and Longevity
A car is a significant investment, and regular maintenance, including washing after rain, preserves its value and extends its lifespan. The build-up of contaminants and the onset of rust can lead to costly repairs and decrease the vehicle’s resale value. By maintaining the car’s aesthetic appeal, you’re also ensuring it commands a better price on the market.
7. The Psychological Boost
Beyond the practical reasons, there’s a psychological benefit to driving a clean car. It’s a reflection of the owner’s pride and care for their possessions. The act of washing your car, especially after it’s been dirtied by the rain, can be a cathartic experience, offering a sense of accomplishment and satisfaction.
In Conclusion
Washing your car after the rain might seem like an additional chore, but it’s a critical step in vehicle maintenance. It’s not just about keeping your car looking good; it’s about preserving its health, ensuring safety, and maintaining its value. Recognizing this, we at Washos are excited to extend a special offer exclusively designed for the aftermath of rainy days.
Automotive Clay Bar is an engineered resin mixture that auto detailers use to remove contaminants and pollutants from the surface of your car’s paint, glass, fiberglass, and metal. Detailing clay can be natural or synthetic. However, synthetic clay bar is most common these days.
Since clay bars are clay-like, they are very elastic. This elasticity means they can be easily molded and stretched. This is perfect for using on cars we need to roll, flatten and pull the clay bar for different sections of the vehicle.
A Clay Bar Treatment is the process of using a clay bar to remove containments from the surface of your car. Common containments that pollute and slowly destroy your vehicle include things like rail dust, brake dust, and industrial fallout. These pollutants can penetrate through paint, glass, and metal and settle on those components even after several car washes and polishing.
When detailing clay is used correctly, it is 100% safe, and nonabrasive. In fact, it is less abrasive than polishing or buffing the surface.
How frequently should you do a clay bar treatment?
At Washos, we recommend claying twice a year, but you can do it as often as you want as long as you know what you’re doing.
It’s pretty easy to determine whether you should clay right now. Massage your hand along your car. Do you feel roughness? If so, it’s time to clay and draw those particles out of the paint.
II. How Does Clay Bar Treatment Work?
As we mentioned earlier, auto detailing clay bars are a resin mixture designed to remove containments from surfaces. When you glide the clay bar along the surface of your car, it picks up anything extending from the surface. The dust and dirt get stuck to the clay, and so you’ve successfully removed the containment.
An important note to keep in mind is that you always spray lubricant or detailer spray before claying. The lubrication stops loose debris from scratching your car.
Clay is better than polishing because the polishing process sometimes removes a thin layer of paint, while claying is nonabrasive.
III. What is in a Clay Bar Kit?
If you’re just starting out with claying, we recommend buying a clay bar kit. You can find these kits being sold on Amazon and automotive product websites. We recommend Meguiar’s G1016 Smooth Surface Clay Kit. It is highly rated and has everything you need to get started.
In a typical clay bar kit, you will find:
Clay Bars
Clay Bars usually come in 2 to 8 oz. bars. Typically, 2 ounces is enough to do three or four vehicles. We estimate that one 2 oz. clay bar will last you 18 months to 2 years if used on the same car.
A Microfiber Towel
Microfiber towels (sometimes called microfiber cloths) are one of the most essential tools used by car detailing experts. A microfiber is an incredibly tiny synthetic fiber. It is approximately 1/100th the diameter of a human hair. The fiber is made from a blend of two materials: polyester and polyamide. Polyester and polyamide are blended at different ratios to create different types of microfibers. This results in a broader range of microfiber towels for unique applications
Detailer Spray or Lubricant
It is essential to use the detailer spray or lubricant before starting the claying process. The lubricant form as a thin film over the surface so that they clay bar doesn’t stick to the surface or damage it with the debris. Additionally, it is harder to clay without lubricant since the clay doesn’t glide over smoothly
There are two common types of clay lube: quick detailers and a combination of water and shampoo solution. At Washos, we recommend using detailing spray over the water and shampoo solution.
The solution may damage the clay bar, which will lead you to using more clay. The detailer sprays are engineered to complement the clay bars and give them that smooth flow across a variety of surfaces.
IV. What are the Best Clay Bars?
Clay bars come in different colors, at various price points, for multiple purposes. However, the most critical factor for you to consider when deciding to buy a clay bar is aggressiveness. Clay bars aggressiveness generally ranges from consumer grade (medium grade) to professional grade (fine grade).
Consumer grade (medium grade) clay bars are gentle and will need more work when cleaning extremely contaminated surfaces, while professional grade bars are aggressive and will swiftly remove contaminants.
If you know what you are ready and have plenty of experience claying, then only do we recommend buying the professional grade (fine grade) clay bars. The fine grade bars are more effective against dirt, but they can also damage your paint easily.
The Meguiar’s G1016 Smooth Surface Clay Kit is an excellent kit for beginners.
How to Store Your Clay Bar
Store the clay bar in its original case, or in a sealed plastic bag. Spray it with the lubricant to keep it wet. Do not allow the clay to freeze and do not store it in temperatures above 200° F.
V. How to use a Clay Bar
Carefully follow these steps to learn how to use a clay bar on your car:
1. Clean your car
Before using a clay bar, we suggest that your vehicle should be washed and dried to eliminate most of the surface containments.
2. Use detailer spray
Start by spraying a small area of your car with the lubricant or detailer spray. Keep the sprayed area less than 2 feet.
3. Glide the clay bar
The next step is to gently slide the clay bar back and forth across the freshly lubricated area. You can initially anticipate the surface to pull the clay while it is taking out all the contaminants. When you can feel the clay gliding effortlessly, then you will know that the area is clean.
4. Check the clay bar
You should keep monitoring the clay to verify that you’re using a fresh side. After you’ve used both sides, you can fold the clay a couple of times, press it, and then straighten it. You can now continue, but you should keep checking to see if any pieces of dirt could damage the surface of your car.
If the clay seems to be discolored, or rough, then you should throw it away and start with a fresh piece of clay.
5. Check your work
After you’ve finished claying an area, wipe the area down with a microfiber towel. You can also use the lubricant to remove any clay residue. To check if it’s clean, slide your fingers across the paint. If it’s smooth, then you’re solid. Otherwise, you will need to re-clay that area. Remember to re-lubricate as required.
Repeat these steps until you’ve cleaned the entire vehicle. You can use clay on glass and chrome, too.
6. Finishing up
You can finish up with a wax. The wax will fill any gaps left from the contaminants and it will shield your paint from corrosion.
VI. Clay Bar Alternatives
A popular alternative to clay bars is mitts or clay mitts. They’re efficient and do the job as well. A typical clay mitt is a rugged microfiber mitt with one side made of a rubber polymer coating that picks up surface contaminants like tar or bugs.
There is one downside to using mitts though. They are known to cause more damage to the paint than an automotive clay bar. If you use a mitt, then make sure you’re generous with the lubricant to avoid any damage. The most popular mitt brand is Nanoskin Autoscrub Wash Mitt.
Compared to other dreaded irritants to your car’s paint like overspray, tar, squashed bugs, or other debris, water spots sound pretty tame. The fact is, that water spots have the potential to damage your paint every bit as much as many other troublesome contaminants.
TABLE OF CONTENTS
I. Overview of Water Spots
II. Washing Your Car
III. The Vinegar Method
IV. The Clay Method
V. Water Spot Remover Products
VI. Conclusion
I. Overview of Water Spots
Water usually comes in contact with your car in one of three ways including overspray (sprinklers, etc.), rain, or washing your car. So how can a little bit of water hurt your car’s finish?
Water contains varying amounts of minerals and microscopic debris, or particle pollutants, which can not only dull your car’s finish but have the potential to do real harm to your vehicle’s paint.
Types of Water Spots
1. Regular Water Spot
Regular old tap water can cause a buildup of total dissolved solids (TDS) on your car’s paint. Naturally occurring minerals are found in water. Hard water is rich in dissolved minerals, especially magnesium and calcium. These minerals lead to water spots, or limescale, hard chalk-like deposits that can prove difficult to remove.
2. Bonded Mineral
Particle pollutants include microscopic particles from sources such as forest fires, smoke from wood stoves, emissions from industrial plants and vehicles, and dust from construction sites. These tiny particles can either fall on your car in the form of dust or mix with rainwater to plague your paint’s finish.
Rainwater is always acidic to some degree. Acid rain, as we know it, is rain with higher amounts of nitric and sulfuric acids absorbed from the atmosphere. These contaminants combine to create water spots and leave behind hard deposits after the water evaporates. These deposits can bond to your car’s paint and even erode the clear coat If not removed properly.
3. Etching
Etching is typically seen when water spots are baked into the finish as a result of high heat or direct sunlight. Severe etching can require the use of an abrasive means to correct the situation including wet sanding for severe cases. A qualified professional is recommended in this scenario as improper handling and application can lead to irreparable damage to the car body.
II. Washing Your Car
Let’s first consider the most straightforward avenue for removing water spots from your car. A solid start is a complete wash and dry. Yes, you know how to wash a car, but here are a few tips and reminders to make your car washing experience more efficient and successful.
Many dealers recommend using portable deionizers or in-line water softeners for car washing. While water quality is an all-important aspect of water spotting prevention, many consumers do not own or can’t afford these extras.
Buy a few gallons of distilled water at your local grocery store to use as a final rinse after washing your car and rinsing with your ordinary tap water.
Avoid washing your car in direct sunlight. A shaded area goes a long way to help keep your entire car wet during the washing process so that water does not dry on the car and lead to more water spots.
Be sure that you rinsed all loose debris away from the car. Never wipe a dry car or begin washing before rinsing away debris or you may inadvertently scratch the finish.
It’s preferable to use a washing mitt with long strands that will not grind debris into the car.
The all-important rinse bucket will keep your mitt or sponge clear of dirt and grime as you wash so that you are not depositing that dirt onto other areas as your wash. Be sure to replace dirty rinse water as needed.
Wash the wheels first to prevent soot and grime from splashing on the clean car.
Have plenty of clean drying towels on hand. Never air dry your car as evaporation is not your friend. A thorough drying process will go a long way to preventing new water spots and will leave your finish looking much nicer. We recommend using good quality microfiber towels.
III. The Vinegar Method
White vinegar is a low pH form of acetic acid and is a great hard water spot remover. The minerals found in hard water such as calcium hydroxide (slaked lime) have a high pH factor and usually respond well when treated with vinegar or other low pH removers.
Prepare the vinegar solution by emptying equal parts of white vinegar and distilled water into the bucket.
Tip: Distilled water allows for a more acidic solution as it is free of any minerals that may weaken the pH of the vinegar.
Step 1
Test a small area using a clean sponge wet with the vinegar solution. Apply to a water spot and allow it to remain for up to one minute to loosen, and hopefully dissolve, the water deposit. Rinse and gently wipe the area dry.
Step 2
Continue to apply the solution to affected areas, keeping the water spots wet with the vinegar mix for at least 1 to 2 minutes. Gently wipe the water spot, rinse thoroughly with water, and towel dry.
Tip: Use a light touch. Do not aggressively rub the spot as this may lead to a scratched finish.
Step 3
The vinegar solution will likely remove any sealants or waxes. If you use a vinegar solution to remove hard water spots, re-apply paint sealant or wax to restore and protect your car’s finish.
IV. Clay Method
Detailing clay can be effective at removing contaminants in water spots such as metal fragments, ash, dust, and other particle pollutants. It also works well on removing water spots from car windows and the windshield where the hardened residue does not penetrate the glass surface.
Be aware, however, that claying may not resolve water spots from mineral deposits. Read our detailed guide to claying your car here.
What you will need
Detailing clay bar
Clay lubricant (with a spray bottle)
Microfiber towel
Step 1
Lubricate a defined area with a clay lubricant to prevent scratches to the finish as the clay bar is moved over the surface of the car.
Step 2
Gently move the detailing clay over the area. The clay bar will grab areas where contaminants and grit are present.
Step 3
Work on noted spots from multiple angles.
Step 4
Continue to lightly rub the clay bar over the area until it glides freely without grabbing at the surface.
Tip: As the clay bar becomes soiled, it can be folded to expose a clean portion of the bar.
Step 5
Wipe each section with a clean, dry microfiber towel when finished.
V. Water Spot Remover Products
Meguiar’s A3714 Compound Water Spot Remover – 16 oz. Meguiar’s is a trusted brand and used by many in the automobile field. This formula is designed for water spot residue on paint, chrome, and glass surfaces, and is safe for clear coats. It should not be used on satin or matte finishes and should be spot tested before use.
Boat Bling HS – 0032 Hot Sauce Premium Hard Water Spot Remover – 32 oz – Environmentally safe and biodegradable, this specialized formula works to remove water spots without stripping the wax or sealants from your car’s finish. Silicone sealants and high gloss polymers in Boast Bling work to end water spots and keep your car’s shine at its best.
Eraser Water Spot Remover 16 Oz – Gel. For Paint, Glass, Windows, and Mirrors – This gel formula removes hard water spots by eradicating the mineral deposits left behind by water. The fast acting, acidic mixture softens minerals but will not scratch paint, metal, or glass surfaces. Great for windows!
VI. Conclusion
When all remedies fail to remove water spots on your car, etching may be the reason. Older, hardened water spots lead to etching of the paint’s surface, leaving a cavity in the finish. Etching then leads to increased water retention and encourages a build-up of contaminants as the sunken cavity, however slight, tends to attract and hold water.
Abrasion of the car’s surface may be needed at this point to level the finish. The paint is an important factor as to the level of difficulty with this process. We recommend seeking a qualified professional to complete this process.
Preventing Water Spots
As with any maintenance and repair, prevention is critical. The best way to get rid of water spots on your car is through routine care.
Keep your vehicle clean – Wash your car on a regular basis and never air dry.
Always use a clean, soft towel or microfiber cloth to dry your car thoroughly.
Use a quality car wax or sealant to keep your car’s finish protected and looking good.
Watch where you park – Avoid areas where sprinklers or overspray is likely to occur.
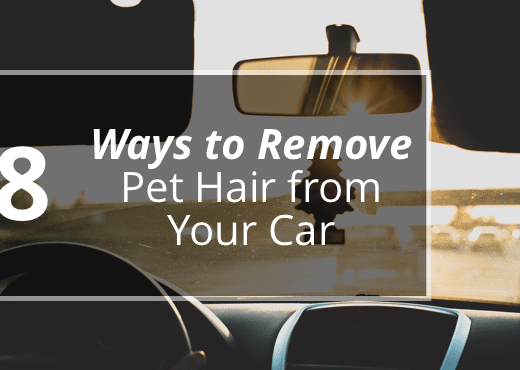
Whether your pet only rides in your car occasionally, goes to work with you every day, or you consider yourself the proud parent of a furbaby that rides along wherever you go, pet hair in your car can be a problem. Read on for the eight best ways to remove pet hair from your car.
You have had your furry friend lay on blankets, you vacuum your car regularly, and still, you find pet hair embedded in the upholstery of the seats, the floor, and probably every nook and cranny of the car which leaves you wondering, how did that get there?
Of course, we love our pets dearly. Banning them from the car is not an option. So how do you remove, and keep, your vehicle’s interior free of pet hair?
It goes without saying that you begin any hair removal process with a good round of vacuuming. Extracting the loose hair is the first step, and goes a long way to rid your car of the majority of the hair.
While this is an all-important step, it is the stubborn, embedded strands that are troublesome, so let’s get down to it.
Tip: Invest in a hand-held vacuum that is easy and convenient to use. A user-friendly, handy appliance will be used more often, and your routine will have a better chance of success. We recommend the Lolldeal Car Vacuum ($21.99 on Amazon).
II. Rubber
One of the most common tools for removing hair from your car’s carpet or upholstery is a rubber glove. That’s right, just like the bright yellow glove worn to scrub toilets (but don’t use that one!). You can use a household rubber glove typically used for cleaning. If you choose this option, it’s good to get the ones with nubs on the palm side of the glove. You can also use a latex glove (or Nitrile glove if you have an allergy or are sensitive to latex).
Wearing a dry glove, run your hand over the seats and carpeted areas of your car, wiping from top to bottom and in one direction only. You can dampen the glove if the dry process does not produce the results you want. Moisture adds weight to the hair and helps it to clump.
A sponge or wet washcloth can be used in the same manner if you do not have rubber gloves on hand. You can also find gloves on the market that are specifically designed to remove pet hair, but you might want to try a regular household rubber glove first.
III. Velcro Curlers
This is a simple process that only involves running, or rolling, the curler over the surface area. This method works best on sturdier materials such as carpeting/flooring. This way can be used on upholstery, but you should try out the curler on a small test area to make sure that it won’t snag the fabric or make it pill.
The curlers can also bend which makes it handy to reach corners and tight spaces. Designate a few curlers for this purpose and keep them separate from others.
IV. A Balloon
Ever thought of using a balloon? An inflated balloon uses static electricity to attract pet hair. As you run the inflated balloon over the surface area, hair collects on the balloon which can then be wiped clean, reused as needed, and discarded when done.
This method does a reasonably good job at removing simple, loose pet hair, but would not be effective on strands that are embedded.
V. Duct Tape
Save the lint roller for your clothes. Packing tape or duct tape can be used to pick up those pesky hairs left by your pet. This method is as conventional as using a lint roller for removing pet hair from fabric, but lint rollers are expensive and less effective on pet hair embedded in your seats and flooring.
Although you can use either type of tape, packing tape has a lighter touch and is less likely to leave a residue of any kind. Wrap the tape around your hand with the adhesive side out and press firmly. Just lift, and see the results. You will have to replace the tape as you go to maximize effectiveness.
VI. Pumice Stone
Pumice stone is a cost-effective and reliable choice for removing pet hair from your car’s interior, especially the flooring and car mats. Careful testing of any seat fabric in your vehicle is required to ensure that you do not damage your upholstery.
What you will need
A pumice stone (Fur-Zoff Pumice Stone $8.70 on Amazon)
Spray bottle
Fabric softener
Water
A small bucket
The pumice stone method is best completed with the use of a fabric softener solution to break any static bond in the flooring and loosen the hair, and also serves to soften the abrasive quality of the pumice stone. Wipe the surface area in one direction as a back and forth motion may further embed the hair.
To rid the stone of debris, simply spray the stone with the softener solution or dip into a rinse bucket during the process to quickly wash away hair from the stone.
Tip: A fabric softener solution of 7-parts water to 1-part liquid fabric softener is a great way to help release pet hair, freshen your upholstery, and eliminate static cling in your car. This solution can be used with any pet hair removal method.
VII. Dryer Sheets
Arm yourself with a fresh, unused dryer sheet to effortlessly remove pet hair from all surfaces of your car. No need for water or any other solution. Just run the dryer sheet over the surface of the seats, flooring, and console to pick up dust and pet hair.
VIII. Wire Brush
A wire brush is a handy tool for retrieving those hard to get, stubborn strands of pet hair that just won’t budge. This method works in much the same way as using a pumice stone.
Often, pet owners use a wire brush as the end-step of their cleaning process to ensure that they have removed all traces of pet hair and debris. Some prefer a rubber-bristle brush which you can purchase for under $10, and many times for under $5.
IX. Squeegee
Don’t you just love an inexpensive, multi-use tool?
A squeegee is a perfect tool for removing pet hair from your vehicle’s interior. The rubber blade catches hair as you move it against upholstered seats or flooring. Move in a single direction from top to bottom. Wipe the hair from the blade and continue the process.
You can find low-cost squeegees at most stores and in varying sizes to suit your needs. Easy to clean and reusable, this tool is a great value and makes hair removal a snap. And you can clean your windows afterward!
X. Preventing Pet Hair
While it is impossible to prevent pet hair from infiltrating your car entirely, there are a few ways to lessen the amount of hair left behind:
Tip 1
Give your pet a good brushing before you go out. If your furry friend is agreeable, you can even use your vacuum to make sure that all loose hair is safely kept away.
Tip 2
Buy a pet seat cover for your car. These finds keep fur, dirt, and mud from soiling your car seats. These can be conventionally washed and put away between uses.
Tip 3
It is important to keep pets contained, and in some states, it’s the law. A comfortable pet harness or crate will keep your pets safe and keep the spread of hair to a minimum.
Car wax has come a long way since it was first developed in 1800 using animal fats to polish and shine carriages. Today’s car waxes are produced using finely-tuned processes that have elevated the use of natural waxes that include vegetable wax, beeswax, and oils, as well as synthetic bases, to shine and protect your vehicle like never before.
Car wax is a formulated blend of waxes, oils, and solvents which can include crude oil distillates, ethanol, mineral spirits, petroleum, naptha (commonly used as a thinner for wood varnishes and paints), and more.
A wax compound adds a layer of protection to the paint and can also bring out the best of your vehicle’s luster and shine. While waxing brings out the beauty of the paint, it’s most important job lies in its power as a protectant. A good wax will see your car’s paint through moisture, UV rays, intense heat, a battery of pollutants, and will help prevent the dreaded oxidation process.
II. What is Carnauba Wax?
Carnauba wax is a plant-based, vegetable wax that is produced using the leaves of the Brazilian Palm tree referred to as the “Tree of Life.” The waxy substance protects the trees from the sweltering sun of South America.
Carnauba wax is the preferred wax of car enthusiasts and collectors, and is commonly agreed to be the ultimate wax base for many car wax formulations. Natural carnauba is blended with oils, petroleum distillates, solvents, and other like ingredients in order to be worked into a useable car wax product.
A car wax that specifies a percentage of purity in terms of carnauba refers only to the purity level of the carnauba wax used in the product, not the amount of natural carnauba wax in the formula itself.
Carnauba will give you a one of a kind finish. It can bring out an outstanding, glossy shine and create a showroom finish for your car. It is noted, however, that carnauba wax will have to be used more frequently than synthetic wax products.
III. What is the difference between Car Wax and Car Polish?
Before we go any further, let’s make sure that it’s understood that car polish and car wax are two very different things.
Car polish is used as a remedy. Polish removes the dirt, grime, grease, and scratches that are left behind after a good washing. Solvents within the polish allow it to remove, or at least reduce, impurities on the paint surface and will bring out the shine.
Car polish should be used in a multistage process of caring for your vehicle’s paint because, while it can make your car look great when finished, it does not seal or protect the paint. Waxing is the only true way to protect your car’s paint and should be completed after the polishing step.
IV. What are the Best Car Waxes?
The best wax varies by need.
Natural Car Wax
A true car wax is created with a naturally-occurring wax base such as carnauba wax, beeswax, or the like. Waxes can be categorized into cleaner waxes and finishing waxes and which one you need depends on your particular vehicle. A paint sealant is a synthetically-produced product.
Cleaner Wax
A cleaner wax is often called an All-in-one or One-step product. These waxes contain chemicals, and sometimes abrasives, to clean the paint, remove oxidation, polish, and allow a layer of protection for your car.
Finishing Wax
A finishing wax has no cleaning ability. Finishing Wax is the final step of a dedicated multistage process that includes washing, a thorough cleaning, the use of a compound, clay bar, or swirl remover, and a polishing step. It can also be used on an otherwise near perfect paint job in showroom or, at least, excellent condition. A finishing wax lends itself to a highly-prized mirror finish and an ultimate protective layer for your car’s paint.
5 of the Best Car Wax Options for Your Car:
1. Meguiar’s G18216 Ultimate Liquid Wax
Meguiar has formulated the ideal liquid wax for maximum durability, protection, and that deep mirror shine that you’ve been looking for in your car’s paint. This synthetic polymer wax is made up of an advanced formulation that shields your car from water and other harmful influences, and application is a breeze with Meguiar’s ThinFilm technology.
2. Chemical Guys Butter Wet Wax
Utilizing 100% natural carnauba wax at its base, this liquid wax has been refined to perfection. One of the biggest advantages of this product is the ease and flexibility of application. No perfect conditions required here.
Butter Wet Wax can be applied in direct sunlight, on wet paint, by hand or machine. In just minutes, you can have the pure, deep, wet shine of a showroom vehicle. Chemical Guy’s newly improved formula “Melts like butter into paint” and is better than ever in protecting your vehicle from the sun’s damaging rays, road tar, water spots, and bird droppings.
3. Wash Wax All by Aero Cosmetics
Let’s talk about the most environmentally-safe product choice. Aero Cosmetics developed this Wash Wax All product over 30 years ago for use with aircraft, but it’s now a booming success with vehicle owners. This one product does it all concept has been verified to satisfy all of its claims.
Wash Wax All is biodegradable, can be used with water or as a waterless wash and wax, is safe for interior detailing as well as the exterior, is a sealant yet cleans, and is the economical big hitter. One 128 ounce bottle can complete 15-16 applications for under $3.00 each. Now you can wash and wax anywhere, at any time, for your convenience.
4. Car Guy’s Liquid Wax
Car Guy’s Liquid Wax is a popular alternative. This liquid wax is one step in a multi-stage process. Durability is key with CG Liquid Wax, as users can expect continued protection and shine for up to one year.
The long-lasting mirror finish is achieved through the use of new additives developed through polymer nanoscience that has yielded changes to the chemical properties of their liquid wax. Car Guys suggest using their Hybrid Wax Sealant after application of the liquid wax to realize the best benefits of this product.
5. Collinite’s No. 845 Insulator Wax
Thinking a little outside the box: Try what others have found to be a fantastic alternative; Collinite’s Insulator Wax. Collinite’s Wax was originally developed for power companies as a protective measure for high-voltage power lines. In the last 40 years, applications have included marine and industrial applications and today it’s increasingly known for its outstanding performance on passenger vehicles.
No. 845 Insulator Wax is a high-grade formulation that is safe for your car’s clear-coat and requires little buffing. Use Collinite’s Insulator Wax as part of a multi-step process. Note specific instructions on proper use/liquefying step of the process. Gorgeous results are long-lasting and dependable. An advanced level of protection and impressive beading properties will sell you on this product.
You can read Consumer Report’s Car Wax Ratings here.
V. How to Wax a Car
1. Gather The Equipment
A trusty bucket and clean sponge is a must. Ideally, have more than one on hand, one for soap and one to aid in rinsing.
Car polish (if desired or if using a finishing wax)
2. Prepare your car’s surface
Wash your car to remove surface debris. Make sure to begin with the wheels to avoid having any dirt or grime splatter on the car surface as you progress.
Use a clay bar on the freshly-washed car to remove contaminants, pollutants, excess grime, and tar. Rub the clay bar across the wet surface until the paint is smooth and free of contaminants. A clay lubricant can be used to keep the paint’s surface lubricated while claying. Read our guide on how to do a clay bar treatment here.
Use other compounds or swirl removers as needed.
3. If Applying an All-in-One or One-Step Cleaning Wax Product
Some of the preparation above can be accomplished if using a cleaning wax. Apply the specific steps as needed for your vehicle. A cleaning wax requires some elbow grease as it is designed to also clean the paint. A cleaner wax should be worked into the paint surface. The worse the condition of the paint, the more energy you will need to exert.
Methods vary by product as cleaning waxes come in paste, liquid, and spray forms. Read and follow the instructions of the product you choose carefully for best results.
4. Polish your car
Note: Do this step especially if you are using a Multi-step process ending with the use of a finishing wax. This step is not required with the use of a One-Step or All-In-One cleaning wax.
Once your car feels smooth, it’s time to polish. Apply the polisher to a clean cloth if polishing by hand (a dual-action polisher can be used if you have one on hand, and is safe, easy, and saves time).
Apply in one small area at a time, concentrating on any areas where marks, scratches, and other damage exist. After a short time (a minute or less), wipe off the polish residue while still wet.
Next, apply the polish to the entire surface of the car, working in small areas at a time. In the end, you’ll have a vibrant and glossy finish as the polish will correct the paint, remove a vast majority of fine scratches, and will bring out the natural beauty of the paint.
5. Apply the Car Wax
Apply car wax using the recommended procedure outlined in the product’s specific instructions. Unless noted otherwise, the wax is normally applied in the shade to prevent trouble buffing the residue from the paint.
Apply car wax to a dry vehicle unless the product’s instructions say otherwise. Wet paint can cause streaks. Apply the wax in small, circular motions. Apply a thin layer of wax to the entire paint surface.
Let the wax dry. Times will vary by product. Generally, a hazy, or matte appearance will let you know that it’s time to buff away the wax. Use a clean microfiber towel to remove the residue, rotating the towel frequently to prevent caking.
Admire the results of your hard work!
VI. How Often Should You Wax Your Car?
How often you need to wax your car depends on the type of wax you prefer to use, your driving habits, environmental conditions in your area, and your specific car and what you expect from it.
Most waxes commonly suggest that car wax is reapplied every three to four months. Some products will claim that you only have to use them up to once a year. But, as you can imagine, there are variables that limit this potential.
Overall, taking care to shield your car from the elements on a regular basis will help to increase the time between waxing. Seeking shade, and avoiding trees where birds love to flock help a great deal, but there’s only so much you can do when it comes to environmental concerns. Smog and air pollutants are not your paint’s friend.
Car Wax plays an all-important part in the proper care of your car exterior. It’s not all about vanity (but hey, you want your car to stand out, right!). Your car is a big investment, and car wax helps to protect that investment and increase the life of your car’s paint.
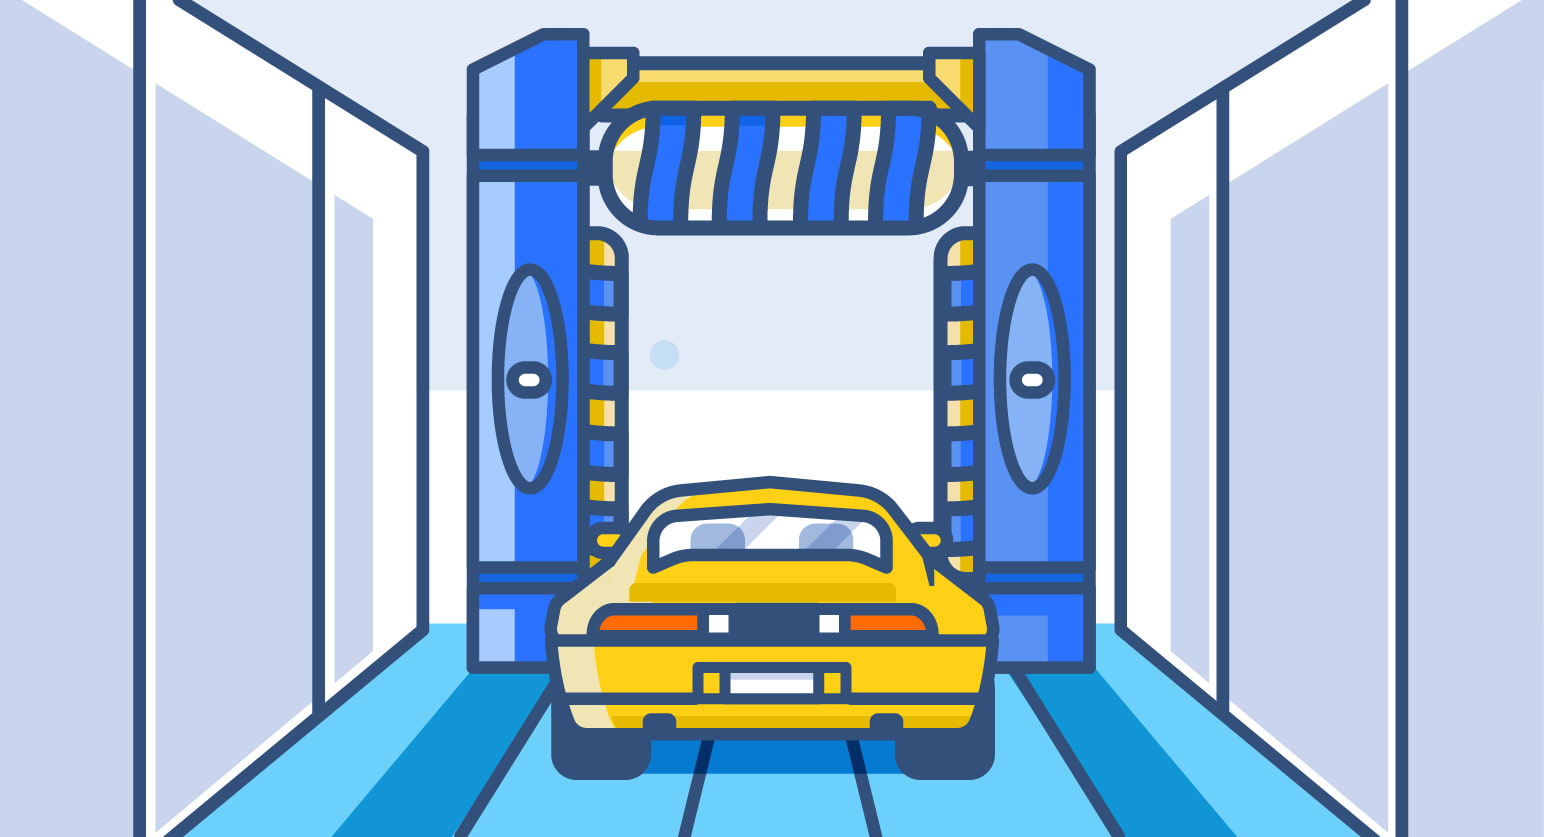
The car wash industry is incredibly dynamic. This is an industry that’s been growing and changing considerably in recent decades, and consequently, it’s filled with exciting opportunities for entry and innovation.
You’ll probably be shocked to learn, for instance, just how much revenue car washes generate each year, both within the United States and globally. Likewise, you’re likely to be surprised by how many owners of car wash businesses have only recently entered the industry. As the number of cars on the road continues to increase precipitously, we can expect even more demand for car washes and auto detailing. Read on to learn more about some of the most mind-boggling statistics backing up these noteworthy trends, and perhaps to gain insight into your own ideal point of entry into the car wash industry.
1. The car wash industry has been experiencing considerable growth, both short- and long-term.
The growth that’s being seen in the car wash industry is notable. In 2012, for instance, 2.1% more cars were washed than in 2011. (That may not seem like much, but consider that in five years a continuation of that trend would amount to a more than 10% increase.) (Source: Brandon Gaille) Likewise, on a longer time-scale of almost two decades, there have also been major increases in the industry: more than 19.2% more consumers used a car wash in 2014 than did consumers in 1996. (Source: Big Man Washes)
2. This growth is predicted to continue—industry revenue growth for the car wash and auto detailing industry is forecasted at an average yearly rate of 3.3% up to 2018.
There are multiple factors behind this trend. First, consumer discretionary spending—in other words, purchase of non-essential, but typically desirable goods and services—is expected to climb. Second, sales of both new and used cars reflect the likelihood of growth in the related car wash industry—more cars on the road means, of course, more need for car washes. Third, professional car washes will be sought out by those with increasing environmental awareness, because car washes use considerably less water than home washing—potentially reducing water use by more than two-thirds. (Sources: Big Man Washes & San Diego Car Care)
3. In the United States alone, there are 16,000 car wash establishments, whose yearly revenues add up to a shocking $9 billion.
For the sake of clarity, the term “establishments” refers to both single-location businesses and individual locations of businesses with multiple locations. Additionally, these are businesses that do the following: cleaning, washing, and waxing for all kinds of vehicles, not just standard cars. When you start looking at this at a global scale, the numbers are even more striking, as there are a total of over 150,000 car wash locations worldwide. (Source: Dun & Bradstreet)
4. There’s plenty of room for new businesses to get in on the action in this growing industry.
Luckily, this isn’t an industry that’s dominated by a few big chains. On the contrary, the vast majority of car washes are owned by small business owners—90%, to be exact. This suggests that it’s an industry that doesn’t require a massive initial investment to enter. And keep reading to find out just how incredibly lucrative it can be. (Source: Brandon Gaille)
5. Plentiful opportunities for entry into the car wash industry are also bolstered by the fact that it has very low capital intensity relative to other industries.
Capital intensity describes the degree to which businesses require high-cost investments in fixed assets to produce goods and services. As of 2012, business owners in the car wash industry spend an average of $0.11 for each dollar they spend on labor. This is because manual labor makes up a major part of the service of car washes, and the average car wash establishment has about 9 or 10 employees. Being a business in a less capital-intensive industry means you’re less likely to experience high levels of depreciation (decreases in the value of your assets as time passes). (Sources: Detail Xperts & Investopedia)
6. Roughly 38 gallons of water are used each time a single car is washed.
That’s a major environmental impact, especially when you consider that daily, an estimated total of about 8 million cars are washed at car washes. That adds up, in fact, to about 304 million gallons of water used for car washes per day, globally. This suggests that there’s room in the industry for green, eco-friendly car washes that would provide the same services while reducing costs to the environment—that niche is definitely something new businesses should consider. (Source: Brandon Gaille)
7. As a result of these factors, there are lots of new car wash owners in the industry, many of whom are experiencing considerable success.
As of 2012, the International Carwash Association states that 37% of car wash owners have owned their businesses for five years or fewer. And they’re potentially making big profits: a survey by Auto Laundry News shows annual profits of anywhere from $55,000 to $100,000 for self-service car washes; meanwhile, full-service businesses can rake in yearly profits of $500,000 to $900,000. (Source: Detail XPerts)
8. The annual revenue of the car wash industry adds up to $48 billion.
Keep in mind that that number also includes gas purchases, as about 65% of car wash locations are savvy enough to also sell gasoline. You might not guess that this is such a lucrative industry when you learn that the cost of a typical car wash averages a measly $15. But these earnings add up to the mind-blowing number of almost half a trillion dollars. (Source: Brandon Gaille)
9. Car washes for heavy users make up 66% of total car washes.
Here, “heavy users” refers to those who use a car wash at least several times per month. They are 28% of total car wash users. (Consumers say their main reason for going to the car wash more often is that it offers positive emotional rewards, making them feel happy.) Meanwhile, 47% are medium users—who go every couple of months—and their washes make up 29% of all car washes. Finally, the 1/4 who are light users (going every 6 months, or less frequently) end up paying for a measly 5% of all car washes. (Source: Big Man Washes)
10. The majority of car washes use in-bay automatics.
There are numerous types of car washes, but the most commonly used are in-bay automatics, which make up just over half (51%) of all car washes. In-bay automatic car washes often involve driving through a conveyor system in which brushes clean your car and high-powered blowers dry it. The next most common are self-serve car washes (wherein the driver uses a high-pressure hose to clean the car themselves), which are 32% of all car washes, and then exterior conveyor washes (where drivers remain in the car as the car moves along an automatic conveyor), at 9%. Finally, full-service car washes are the least common (primarily because they involve hiring attendants who wash the vehicles), constituting only 8% of all car washes. (Source: Focused Car Wash)
11. 72% of consumers who have their cars professionally washed will only do so every couple of months, or even less.
Looking at the frequency of car wash usage, 47% of consumers get their car washed every couple of months, while 20% do so twice a year and 5% only once a year. On the other end of the spectrum, 24% of car wash users will do so more than once per month, and 4% actually visit car washes once a week or more! In surveys, the main reasons consumers give for not getting their cars washed more often is that it’s too expensive or that it’s too time-consuming. (Source: Big Man Washes)
12. Interestingly, and perhaps unexpectedly, winter is the most popular season for car washes.
This may be a surprise because you’d think people wouldn’t want to get their car wet when it’s cold or even freezing out. However, 32% of car washes happen during the winter. Spring and summer are tied for second place in terms of popularity, with each garnering about 25% of all car washes. Finally, fall is considerably less popular, with only 18% of car washes happening during that season. On average, car wash establishments can expect high traffic in the winter and nearly half as much traffic in the fall. (Source: Brandon Gaille)
As these 12 statistics profoundly demonstrate, the car wash industry is much more significant and value-generating than most people realize. You may actually be able to take advantage of this widespread lack of awareness by gaining access to its underappreciated, yet potentially huge profits.
In this article, we’ll describe the most common types of car wash (specifically at-home, hand, drive-through, self-service, and mobile car washes). You’ll learn about the pros and cons of each kind of car wash, as well as how best to find a car wash near me.
It’s important to make the right decision for particular needs, as you might otherwise end up spending too much money, paying for a wash that’s not thorough and leaves your car dirty, or even damaging your car if it’s a really bad car wash.
Luckily, by the end of this article you’ll be well-prepared to find the right car wash option for your vehicle and budget, helping you keep your car in beautiful, sparkling clean, tip-top shape.
Among all of the various types of car washes, washing your car at home by hand will definitely take the most time, but it may be worth it to you depending on your priorities.
This process method involves the following steps: rinsing all dirt from the outer surface of your car; washing the car with warm water; drying with a chamois leather cloth (focusing on getting rid of noticeable streaks); and then applying a good-quality protective car wax.
There are a couple of details to watch out for. First, when you dry your car, don’t dry it in the sun; you’ll get sunspots, which will ruin the look of your car. Second, when you apply the wax, make sure you don’t do so right in direct sunlight.
If you don’t have a hose and a driveway, and/or the numerous supplies necessary to wash your car at home, you may also consider going to a self-service car wash. There you’ll be able to complete the process using their supplies.
Pros:
Probably the most affordable option
Relatively convenient
Cons:
Labor intensive
The most time-consuming option (takes about 2 hours, typically)
You’ll need to buy quite a bit of equipment
May cause damage to your car
Impossible if you don’t have a hose and a driveway or other spot to clean your car at home
II. Hand Car Wash
Let’s say you want the high-quality, detail-oriented touch of a hand car wash, but you don’t have the time, supplies, or energy to wash your car yourself. Instead, you can have your car washed by a hand washing service.
Unsurprisingly, this will be the most expensive option; however, you’re paying more for a reason, as you’ll almost certainly get good results (assuming you go to a reputable location). You’ll also end up saving yourself time and energy, and for lots of people, that’s more than worth the cost trade-off.
You’ll also find that many hand car washing services also give the option to include their valeting services in your service, so that you can get your automobile’s interior cleaned at the same time.
One thing to be particularly aware of when choosing your hand car washing service: make sure that whichever service you choose is completely insured. Ultimately: hand car washes are the right choice if you’re looking for visually appealing results and don’t mind paying a very high premium for them.
Pros:
High-quality, thorough results
The possibility of valeting services to have your car’s interior cleaned simultaneously
Cons:
This is the most expensive option
Pretty time-consuming if you have to wait around
Less convenient than hand washing your car at home
III. Automatic/Drive-Through Car Wash
An automatic car wash is the quickest method for washing your automobile. It’s also typically the cheapest, after washing your car at home. Lots of gas stations offer this kind of car wash, so it’s typically a very convenient option.
To use this kind of car wash, you put your car into neutral and are pulled through a conveyor while brushes, hoses, and blow dryers wash your car. However, despite the convenience of an automatic car wash, there’s a major downside: using this kind of car wash means a pretty high risk of damaging your car’s paint job.
Automatic/drive-through car washes use brushes with very stiff bristles, which are prone to creating tiny scratches in cars’ paint. These minuscule scratches collect dirt and grime, which ends up making your car look dingy and faded over time. Even more alarmingly, larger scratches can actually allow your car to rust—a major problem. Those who are concerned about protecting the appearance and quality of their car should really avoid these types of car washes.
Pros:
Very fast
Affordable
Easy
Convenient, especially because they’re often available at gas stations
Cons:
Doesn’t offer a very thorough cleaning
Can cause considerable damage to your car’s paint work
There can occasionally be difficulties with drying the vehicle
IV. Self-Service Car Wash
Self-service car washes are similar to at-home car washes since in both cases you’re the one doing the work to clean the car. However, self-service car washes are an option for those who don’t have a hose, driveway, and/or the numerous supplies required to clean your car (for instance, those who live in apartments with no garages).
They allow you to, instead, drive up and park your car, spray it with a powerful hose, cover it with soap suds, rinse it off, and then dry the car. Then you can apply protective car wax as needed.
With this car wash option, you get the affordability and overall control of washing your car yourself—but you don’t have to worry, for instance, about buying or storing supplies.
Pros:
Allow you to clean car yourself if you don’t have the facilities or supplies to do so
Great option for those who want to have control over the process of cleaning their car and do a very thorough job
Cons:
You’re paying to have a clean car, but you’re still doing all the work yourself—ultimately, you’re paying for the opportunity to clean your own car
Depending on your skill and experience level, you might not end up doing a particularly good job
Time-consuming
Not very convenient, since you have to go elsewhere to
V. Mobile Car Wash
Mobile car washes are a pretty revolutionary option. They involve having a professional washer come to you and clean your car, by hand, from start to finish. It’s basically a mixture of the best aspects of an at-home car wash as well as of a hand car wash service: you get the convenience of an at-home car wash, but also the high-quality, detail-oriented work—and ease—of a hand car wash service.
Additionally, mobile car washes often involve cleaning both the interior and exterior of your car. They’re a great option to consider if you’re looking to have a spotless car, inside and out, and want to save time and effort to do so.
Pros:
With meticulous attention to detail, your car will be incredibly clean and look as good as new
Extremely convenient, since you barely have to leave the house
Saves your time and energy
Low risk of damage to your car, particularly as compared to an automatic drive-through car wash
Cons:
Can be expensive (but that makes sense, considering the high-quality result you’ll receive)
VI. How to Find the Best Car Wash Near Me
When you’re looking for the right car wash for your car, you shouldn’t just drive into any old car wash you notice as you’re, for instance, driving home from work. Instead, make sure you do your research into the various car washes in your area and get a sense of their reputation.
It’s important to do this not just because you don’t want to waste money on a car wash that doesn’t really get your car fully clean, but also because a really bad car wash could actually cause severe damage to your car (including scratches to the paint job that can cause your car to rust and shorten its overall lifespan).
A great way to find a reliable, high-quality car wash is to check out what’s available in your area on Yelp, a site that aggregates reviews from real people. Just enter your town/city’s name or zip code on the site’s main page, and you’ll be able to browse by price and sort by distance, highest/most reviewed, whether the location is open at a particular time, and even features like whether the car wash accepts credit cards. When you do you’re doing your research, make sure you understand what is included in the price of each service offered.
Car wash options like automatic/drive-through and self-service are pretty standard; if you’re looking for a quick, cheap option and aren’t too concerned about the quality of the wash, you might as well go with that. However, if you take the time to invest in a car wash, it will do wonders for your car and its eventual resale value—and maybe even for your mindset.
Driving around in a clean car–one that smells clean and looks sparkling new– is a truly satisfying feeling, and it’s one that’s worth the extra investment for many people.
We will describe the risks of mold exposure and the importance of preventing mold growth, while also providing a step-by-step guide on how to remove mold from your car. If you’re unlucky enough to already have developed this major problem, don’t worry!
While it may seem like an insurmountable challenge, in fact with the right supplies and with some elbow grease you can restore your car to the safe, clean, comfortable vehicle you deserve.
I. What is mold, and Why is it Dangerous?
Mold is a type of fungus that typically forms in the presence of higher temperatures and high levels of moisture. Exposure to mold can cause major health issues, especially in those who are sensitive to it.
Those who are most susceptible to the effects of mold include those with lung diseases, allergy sufferers, and those with compromised immune systems (e.g. those receiving treatment for cancer, who have had an organ transplant, or who are taking immunosuppressive medications).
The presence of mold can lead to respiratory and skin irritation, lung infections, asthma, and other health challenges. Symptoms can include nasal congestion, wheezing, eye and skin irritation, fever, and shortness of breath. That’s why it’s extremely important to avoid exposing yourself to mold, especially somewhere you’re likely to spend as much time as your car. (And to make sure you never leave your car out in the open if the top is down!)
Luckily, if you notice mold—typically noticeable due to a strong odor, but also potentially visible patches of mold—there are steps you can take to fix the problem. Keep reading to learn how to protect yourself from mold in your automobile.
II. How to Remove Mold
There are, of course, numerous methods to eradicate mold from your car, and everyone will recommend something different. But here’s what we think is the best way to do it.
1. Protect yourself
Always make SURE that you are wearing a surgical face mask or particle mask as well as strong, non-porous household cleaning gloves (make sure they’re solid enough not to break). This will decrease the likelihood of harmful, excessive exposure to mold and its possible toxins.
2. Air out your car in a sunny spot
Sunlight and fresh air are pretty powerful tools in the fight against mold. Like virtually all types of fungi, mold grows in moist areas, so the combination of sun and fresh air dries things out and makes it impossible for mold to survive.
Ideally, on a clear day, move your car to a sunny parking spot and open up the doors and windows (and sunroof, if there is one). Give it a few hours and let any dampness dry out. (Just be sure to keep an eye on the weather—you’ll be giving yourself even more of a problem if a sudden shower appears and your car’s interior is exposed to the elements!)
3. Inspect your car
It’s a good idea to look all throughout your car to get a sense of where the mold is an issue, so you can focus on particular areas in the later steps. Make sure to look at the following: surface of the seats, underneath seats, steering wheel, floor, seat belts, and seat side seams.
Mold can vary in color, so just look for (typically circular) areas of black, green, white, gray, or brown. That’s how you’ll know where you need to focus your cleaning efforts.
4. Prepare before disinfecting
Try to break up patches of mold by gently brushing them with a toothbrush. Then, if you’re lucky enough to have access to one, use a wet-dry vacuum cleaner to vacuum up the mold you’ve just brushed up. (If you can’t get your hands on a wet-dry vacuum, that’s OK—this step is helpful but not essential).
5. Spray with disinfectant solutions
Take out your car’s seat covers and carpets. Before you wash them, you can use any of the following mixtures to kill mold in these sections of fabric:
4 parts white vinegar and 1 part water
1 quart of water, ½ cup of white vinegar, ¼ teaspoon of clove oil, and 1 tbsp of baking soda (note: avoid exposing skin directly to clove oil—it can cause dermatitis and irritate skin and mucous membranes)
Pour either of these mixtures into a spray bottle and spray it on your car’s seat covers and carpets. They should sit on the material for at least 20 minutes—or even longer—in order to ensure that the potent ingredients are able to fully kill the mold and prevent its regrowth.
You may also want to spray other parts of your car where mold has been able to infiltrate and cause odor (including as the dashboard, air vent, steering wheel, and seats).
Stains on the seats, seat covers, and carpets can be removed by sprinkling good old Borax powder on them (yes, it’s useful for so many purposes!), waiting at least 10 minutes, and then sweeping or vacuuming the powder away.
6. Remove the leftover residue
Once the mold has been killed, you can use a wet-dry vacuum to vacuum up the liquid solution. Otherwise, you can wait for the areas to dry and then use a regular vacuum to vacuum up the dried-up mold residue. If you use a regular vacuum, make sure you use one with a bag and then throw the bag away afterward. Otherwise, you’ll be spreading mold spores when you bring it inside to clean your home.
7. Wash your car’s seat covers and carpets
Now that you’ve thoroughly disinfected them, you can use standard detergent to wash your car’s seat covers and carpets. If possible, add Borax powder when you wash them and allow them to dry in the sun if it’s a sunny day (as we said, the sun is incredibly helpful for this process).
If for whatever reason you can’t wash them with detergent, an alternative is to spray them thoroughly (really all over, so that the mold spores are killed) with a solution of water and non-iodized salt. Then allow them to dry in the sun, and wait for the salt to form a crust on the surface, which you can brush or vacuum off.
Salt does a great job getting rid of mold—it dries it out thoroughly and kills it.
8. Optional: use an air freshener spray to remove leftover odors
If you’re bothered by the residual smell of vinegar (which will disappear as the liquid completely evaporates), you can use an air freshener spray to ensure everything smells fine.
Most important is to air everything out—that’s what will leave everything smelling good.
9. Replace the seat covers and carpets, and keep the mold from coming back
Once you’ve washed and dried the seat covers and carpets, it’s time to put them back in your car.
And here’s a key takeaway: since mold requires a wet environment to grow, you can prevent its return by ensuring your car is dry and that it remains totally dry. This is the most important part of preventing mold re-growth.
You can use a dehumidifier to lower the overall moisture levels in your car.
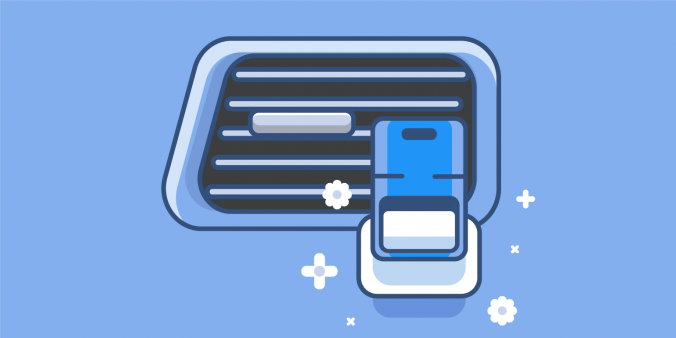
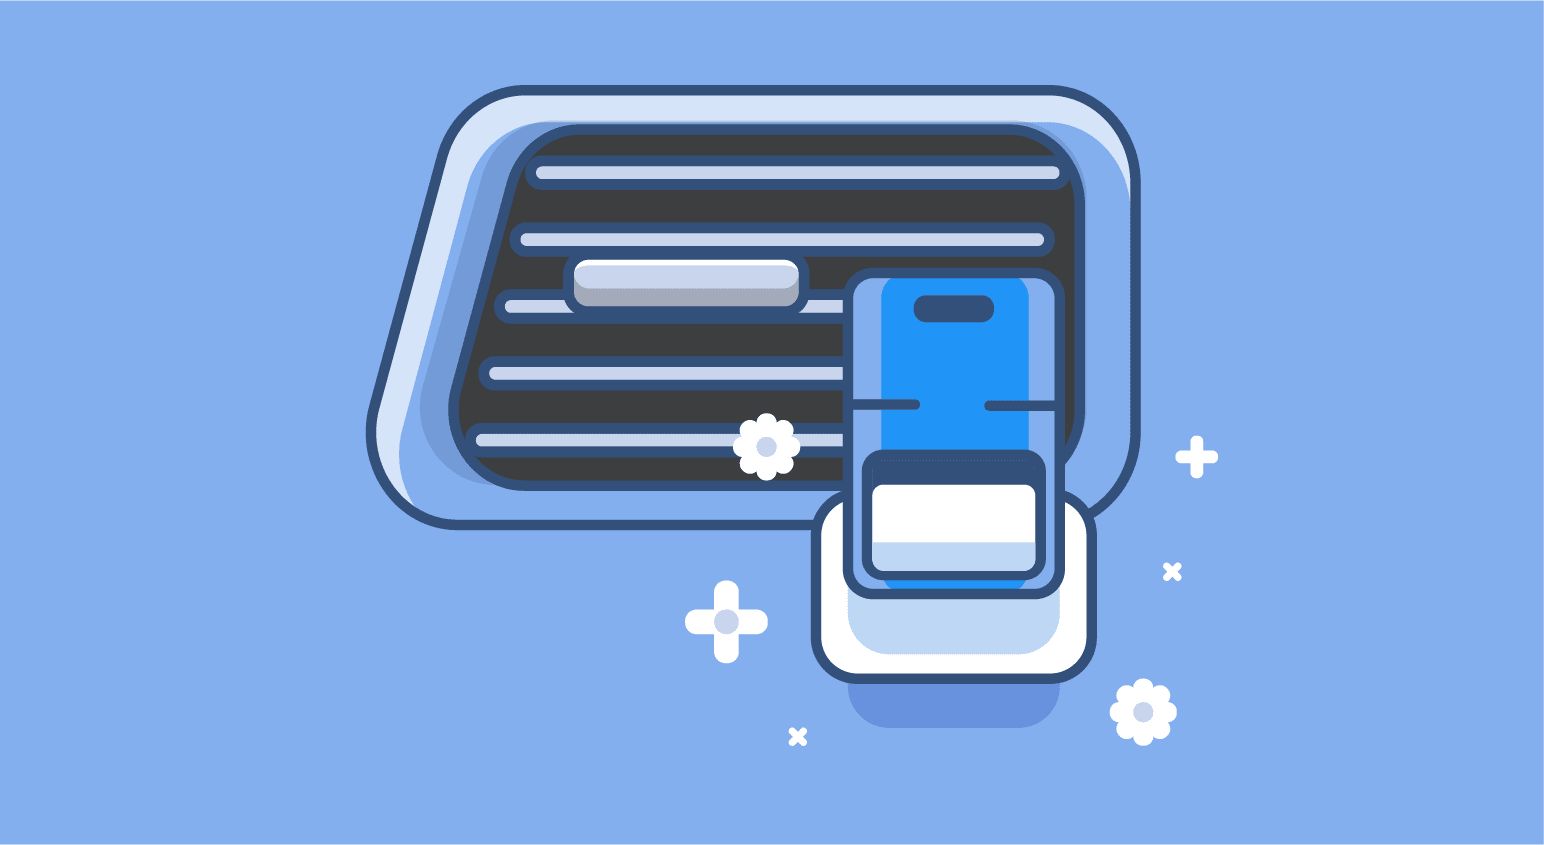
III. Best Car Air Fresheners
If, after cleaning, you decide you’d like to use an air freshener to ensure your car smells absolutely perfect, here are some of the best commercial products to use:
1. Moso Natural Air Purifying Bag
Here’s one all natural option—a linen bag full of pure bamboo charcoal! Activated charcoal is amazing for absorbing moisture and odor. In order to keep it functioning, all you have to do is leave it in the sun to dry (with all the moisture having been absorbed).
It lasts for two years, and then you can open up the bag and use the charcoal as fertilizer for plants. So it’s eco-friendly from start to finish, and won’t expose you to any toxic chemicals whatsoever.
2. Turtle Wax 50819 Power Out! Odor-X Kinetic Whole Car Blast
This is a high-powered canister deodorizer that “seeks and destroys odors at the molecular level”—and does so for up to a month. It can be used underneath seats, on the inside of air vents, and in carpet fibers.
It’s also a pretty great value.
Customer reviews report it’s incredibly effective and easy to use. Note that the initial smell of the product is strong, but the chemical smell will dissipate over time leaving no odor in its wake.
3. Ozium Smoke and Odor Eliminator Gel
This is a gel deodorizer that’s not designated specifically for cars, but also for home and office. It comes with a twist top that allows you to choose the level of odor control.
The product itself has a slight citrusy odor but nothing too strong. It’s a solid product that’s easy to use and very affordable.
4. Chemical Guys New Car Smell Premium Air Freshener and Odor Eliminator
Love the smell of a new car?
This product is engineered not only to eliminate odor from your vehicle but also to add that amazing new car smell (thankfully without the associated toxic chemicals that are part of the real new car smell).
It’s also so concentrated that it can be diluted with distilled water and still work.
And amazingly, all you need for your entire car is one spray.
5. Meguiar’s G2316 Odor Eliminator
Here’s another super-effective spray that gets high customer ratings. It’s a great choice for cars and trucks as well as in the home.
The effects are immediate with a spray as opposed to a gel (which works more gradually over time). That means use of this spray means pretty much instant odor elimination.
Nothing fancy, no frills—just a really effective product for odor removal.
Now you know that as worrisome or even scary as the prospect of a mold-infested vehicle can be, there are options to address the problem. All it takes is some time and effort, with attention to safety (wear a mask and gloves!) and your vehicle can be good as new.
You can even use natural products like vinegar and clove oil solutions to do the work for you, if that’s a priority. And once you’re done, of course, it’s important to keep your car dry, so that you don’t have to go through the trouble of cleaning out the mold again in the future.
In the process of reading this article, you’ll learn why tree sap can damage to your car, and—if you’re already dealing with this issue—you will be provided with a step-by-step guide how to remove tree sap from the surface of your vehicle.
We will cover the best methods for tree sap removal, and discuss the best products on the market that you can use to remove this often infuriating substance yourself if you do decide to go the DIY route.
Although this process may seem very challenging, rest assured that selecting the right products and following our thorough guide will have your car absolutely shiny in no time.
TABLE OF CONTENTS
I. What is Tree Sap?
II. How can Tree Sap Damage your Car’s Paint Job?
III. Best Tree Sap Removal Products
IV. How to Remove Tree Sap From Your Car
I. What is Tree Sap?
Tree sap is equivalent to the “blood” of trees. It contains myriad minerals and nutrients necessary for the tree’s survival, as well as the energy that supports trees’ growth and functioning. (You may be most familiar with tree sap in the form of maple syrup, which made from the sap of maple trees—drilled from the trees and then boiled down into a concentrated and very sweet liquid.)
There are two different liquids found within trees that are referred to as “sap.” The first is xylem, which moves water, hormones, and minerals through the tree from bottom to top. The second is phloem, which is the sticky substance that contains sugars generated by the tree’s photosynthesis (used by the tree to fuel growth)—the conversion of sunlight to energy.
Phloem is the kind of sap that will cause significant frustration when it gets on your car—all that sugar means it’s basically like glue. (In fact, people have used sap as glue in the past for that very reason.)
Tree sap leaking on the outside of a tree is often a sign of disease, damage or pest infestation; this is because trees extrude sap from any wounds on their surfaces, as it functions as a kind of “scab.”
It’s incredibly easy to recognize the presence of sap on your car—it’s very visually apparent in most cases.
You’ll see transparent or red-tinted bumps on the surface of your car. And once you’ve recognized the problem, there are ways to resolve it.
Keep reading to learn how.
II. How can Tree Sap Damage your Car’s Paint Job?
Tree sap really is one of the worst things that can happen to a vehicle’s paint. It’s extremely difficult to remove and can cause more damage than just about any other contaminant.
People often park their cars under trees to benefit from the shade they offer, but the potential effects of the sap that can drip from trees make this a bad idea all around.
Pine sap is exceptionally sticky and problematic. Sap drips onto the car, then “bakes” in the sun to solidify into a resin-like substance. It then eats away at the car’s clear coat and paint, so that every bit of sap has an area of damage around it. It’s almost impossible to wash off using standard car washing techniques, and cleaner waxes, and spray cleaners, and even solvents may be unable to remove this dried-on sap.
The damage that can accrue can be very costly, so it’s important to nip the problem in the bud before it becomes too overwhelming. The longer you leave sap on your car, the worse the paint damage will get.
III. What is the difference between Car Wax and Car Polish?
Before we go any further, let’s make sure that it’s understood that car polish and car wax are two very different things.
Car polish is used as a remedy. Polish removes the dirt, grime, grease, and scratches that are left behind after a good washing. Solvents within the polish allow it to remove, or at least reduce, impurities on the paint surface and will bring out the shine.
Car polish should be used in a multistage process of caring for your vehicle’s paint because, while it can make your car look great when finished, it does not seal or protect the paint. Waxing is the only true way to protect your car’s paint and should be completed after the polishing step.
III. Best Tree Sap Removal Products
These are some of the most powerful, effective products on the market for removing tree sap from your automobile and protecting its paint job:
1. Turtle Wax Bug and Tar Remover
This spray-on foam clings thoroughly to wide areas and works beautifully to dissolve not only sap but also tar and bugs. It functions as a pre-wash or spot cleaner and is formulated to be entirely streak-free. It can be used on paint, glass, metal, and plastic. It sprays as a foam, then becomes a liquid, which can be wiped or washed off leaving a sparkling clean surface with no residue.
2. Stoner Car Care Tarminator Bug, Tar, Sap, and Grease Remover
This spray uses MicroActive cleaning technology to quickly dissolve and break down sap (in less than 30 seconds) as well as bugs, tar, and grease on the surface of your car. It’s also specially designed to work on chrome and paint surfaces without damaging the finish of either material.
3. Swan Isopropyl Alcohol, 99 Percent
Some people say that high concentrations of isopropyl alcohol work better than any other substance to dissolve stuck-on sap. Better yet, it’s easy to find and has many different uses. If you’re thrifty and prefer a straightforward, versatile product, this is a great choice.
IV. How to Remove Tree Sap From Your Car
People will recommend plenty of methods to clean tree sap off of your car. But read on, because we’re offering you what we believe is the absolute best method for doing so.
1. Gather your supplies
You’ll need the following supplies, so make sure you have them all before you begin:
A box cutter blade (for use on glass only—use this if you have sap on your car windows)
Sap remover solution (such as Bug and Tar Remover) or rubbing alcohol
Bucket of water
Sponge/wash mitt
Spray wax/quick detailer polish
2. Wash and dry your vehicle as usual
Use soap and hot water to clean your car, then dry it all off. By washing and drying your vehicle, you ensure that the steps that follow are as practical as they can possibly be.
If you get fortunate, you might even be able to remove the sap with this step, assuming it’s not terribly stuck on.
Additionally, washing your car before removing the sap means you’ll be able to see where all the sap is, and you’ll derive a lot more satisfaction from having a spotless car when you’re done with this process.
3. Locate the spots of sap
As we mentioned, the sap spots will be visible as typically hardened, clear or reddish raised areas. If they’ve been there for a while, they may have begun to eat into your car’s paint job and may also be surrounded by the areas of deterioration that are typical of the long-term presence of hardened sap.
4. Apply sap remover solution (or rubbing alcohol) to the sap spots
Now that you know where the sap is located, you can get into the nitty-gritty of removing it. Pour several drops of sap remover solution (such as Bug and Tar Remover) onto a clean washcloth or terrycloth.
If you don’t want to purchase this product, you can also try using rubbing alcohol, although it’s not designed for this purpose. Place the cloth on the sap and press it onto the area for a minimum of 30 seconds to one minute (the pressure will help the remover to soak into the sap).
After allowing the solution to work, you can begin to use some elbow grease to rub the sap away. Make sure you do so gently because otherwise, you can spread the sap around on the surface of your car, creating a more significant problem.
If the sap is really hardened on and isn’t coming off, you can repeatedly soak the area with more solution or rubbing alcohol, then manually rub it away, until you’ve gotten rid of it all.
5. Remove sap from your windshield/windows
If the sap got on your windshield or windows, first thing’s first: do not use your windshield wipers on fresh sap! It will just spread it around and leave you with messy streaks that are difficult to remove. Instead, you can follow the same steps above.
You can also use a box cutter blade to remove the most hardened pieces of sap from the glass. Just be careful, as these blades are quite sharp.
And be sure to keep the blade flat along the surface of the glass so that you don’t create scratches, which are quite unattractive and can impede visibility over time.
6. Finishing touches
Once you’ve gotten all the sap off of your car’s paint job and windows, spray quick wax onto the paint and clean it off with a detailing cloth. This will leave your car looking good as new with a beautiful finish.
The wax will make sure that the paint and clear coat are thoroughly protected, and that future damage is less likely.
Conclusion
Now that you’re aware of why sap is such a common problem—and one that can potentially ruin your car’s paint job if left too long—it’s a good thing you also know that it’s completely possible to fix.
Your car won’t be permanently stuck with patches of dried on resin; all you need is some essential products, time, and elbow grease, and you can save your car’s paint job and windows from the effects of sap.
And in the future, be sure to avoid parking under trees, and keep an eye out for any new patches of sap, since the longer they sit there, the harder they’ll be to remove.